Showing posts with label Chocolate. Show all posts

Saturday, September 7, 2013

Ferrero Rocher/Nutella Cupcakes

Pin It

The thing I love about cupcakes is that there are so many ways to make them. You can choose from an endless number of flavors, fillings, toppings, and decorations! I feel like the filling tends to give a cupcake its WOW factor...especially when it complements the cake and the frosting. This is one of those cupcakes that has an intensely rich combination of flavors. And let me tell you - the filling is to die for. The Nutella ganache is so good...I ended up eating spoonfuls of it on its own (and probably gained thousands of calories in the process unfortunately). Another reason why this cupcake is amazing is because it has half of a Ferrero Rocher inside along with the ganache. I mean, who doesn't like Ferrero Rocher?! And when you thought it couldn't get any better, this baby is topped with a creamy and delicious Nutella buttercream frosting and another half of a Ferrero Rocher drizzled with some more Nutella ganache. Are you drooling yet??? 
Note: To make it look a little fancy, I also added some edible gold dust powder!

To make this cupcake, you can use the fool-proof/best ever chocolate cake recipe that I've posted on my blog previously. Here's the link to the cake recipe: Beatty's Chocolate Cake Recipe. For this particular batch of cupcakes, I used another chocolate cake recipe which I wasn't as fond of. Will definitely go back to using my original.


The recipe for the Nutella Buttercream Frosting is as follows:

Ingredients:
  • 2 sticks unsalted butter, softened and cut into cubes
  • 4 cups icing sugar
  • 1 tbsp heavy whipping cream
  • 2 tsp vanilla flavoring
  • 1/2 cup Nutella
  • pinch of salt
In the bowl of an electric mixer with a paddle attachment OR using a hand mixer, whip butter on medium speed for 5 minutes until pale and creamy. 
Add the remaining ingredients and mix on low for 1 minute then on medium speed for 5 minutes until light, creamy, and fluffy.
Will keep at room temperature for up to 3 days. 
Tip: To make the frosting more smooth, make sure to sift the icing sugar!


For the Nutella Ganache, the recipe is as follows:

Ingredients:
  • 1/2 cup heavy whipping cream
  • 2 oz semi-sweet chocolate (two 1 oz squares)
  • 4 tbsp Nutella
  • 2 tbsp butter

Using medium heat, bring whipping cream to a boil in a small saucepan over the stove. When the cream starts to boil, remove from heat and add the semi-sweet chocolate squares. Start whisking the mixture immediately until smooth. Do not overmix! Then, add the butter and continue whisking until butter is incorporated. Allow the ganache to cool before using it as a filling - refrigerate for a thicker consistency. 


HOW TO PUT IT ALL TOGETHER AND MAKE THE FINAL VERSION OF THE CUPCAKE:

To create the final product, when chocolate cupcakes have been baked and cooled, use a knife to cut out a small round from the center (about 1 inch wide and 3/4 inches deep). Fill the hole in the cupcake with about 1 tbsp of ganache (or however much you desire). Then cut a Ferrero Rocher chocolate in half. Place one half inside the center of the cupcake. Frost the top of the cupcake with the Nutella buttercream frosting using a piping bag and your desired decorating tip. Finally, stick the other half of the Ferrero Rocher on top and drizzle it all with some more ganache. 


Sunday, November 25, 2012

Chocolate Cake Part 3

Aaaand I made the Chocolate Cake again. For more information, please see my post Chocolate Cake and Chocolate Cake Part 2. Just for fun, I wanted to post up the pictures of this third one I made filled and decorated only with chocolate frosting this time. However, for the decoration, I also used pearls and gold dust to create a festive look since I made it for Eid-al-Adha. (I used a 1M star tip from Wilton to pipe the roses on top of the cake.) I'll probably make this cake again in the future because it is simply the best chocolate cake recipe EVER. So be on the lookout for more posts and different decorations :)


Saturday, November 24, 2012

Oreo/ Chocolate Truffles

If there's been one recipe I've been wanting to try for the longest time (besides making a pie or tart, which I STILL haven't), it's truffles. It all started a few years ago when I had the Oreo truffles at a cousin's engagement party...with the first bite, I fell in love (with the truffle). They are so delicate but easy to make with some practice...I love the rich chocolate center and the number of toppings that one could choose to dip them in. They are great for any occasion, and can easily be given as a gift in an elegant looking box. I'm going to be honest, I was the most excited about all the different toppings I was going to be using, and looking forward to seeing a tray full of colorful, delectable treats. For my first attempt, I would say the experience wasn't so bad at all. The only challenge was dipping the balls into the chocolate when I was making the Oreo ones (more on that later). Out of the two truffles I made, the Oreo truffles were definitely the winner but I loved both. Here are the links to both recipes: Chocolate Truffles and Oreo Truffles.

Chocolate Cream Cheese Truffles coated in a variety of toppings such as chopped pecans, sprinkles, cocoa powder, and dessicated coconut
Oreo Truffles

Chocolate/Cream Cheese Truffles

Ingredients:
  • 1 (8 oz) package of cream cheese, softened
  • 3 cups confectioner's sugar, sifted
  • 3 cups of semisweet chocolate chips OR 19 oz of semi-sweet baking chocolate, melted (I prefer using baking chocolate NOT chocolate chips because it has better consistency)
  • 1 1/2 tsp vanilla 
  • Toppings (chopped nuts, dessicated coconut, cocoa powder, sprinkles, etc.)
1. In a large bowl, beat cream cheese until smooth. Gradually beat in confectioner's sugar until well blended.

2. Stir in melted chocolate and vanilla until no streaks remain. Refrigerate for about 1 hour. 


3. Shape into 1-inch balls and dip and in topping of choice.


Oreo Truffles

Ingredients:
  • 1 package Oreo Sandwich Cookies, divided
  • 1 (8 oz) package of cream cheese, softened
  • 2 (8 oz) packages of semi-sweet baking chocolate, melted 
1. Crush 9 of the Oreo cookies into fine crumbs (either using a food processor, or you can put the cookies in a resealable plastic bag and use a rolling pin); set aside these cookie crumbs for later use.

2. Crush the remaining 36 Oreo cookies to fine crumbs also, and place in a medium bowl. Add the cream cheese, and mix well until blended (I used a hand mixer and it was mixed within seconds).


3. Roll the cookie/cream cheese mixture into balls, about 1-inch in diameter. Place the balls in the refrigerator for about 1 hour. 


4. Take the balls and dip in melted chocolate. Place each chocolate-covered ball on a wax paper-covered baking sheet. If you have leftover chocolate, you can store it in a covered container at room temperature for another use.
(Note: This part is tricky! Use a fork and spoon to lift up each ball and roll it around in the melted chocolate OR use the fork to life the ball and use the spoon to pour the melted chocolate on each ball until it's completely covered in chocolate.)

I only used 8 oz of chocolate here since I halved the recipe
The best way to melt baking chocolate - using a double broiler  or melting the chocolate in a pot over another pot of simmering water
YUM! steaming melted chocolate
freshly dipped Oreo truffles 
5. Sprinkle the top of the chocolate covered balls with the remaining cookie crumbs. Refrigerate the truffles for about 1 hour or until firm. Store the leftover truffles in a covered container in the refrigerator.

Chocolate Truffle Cheesecake

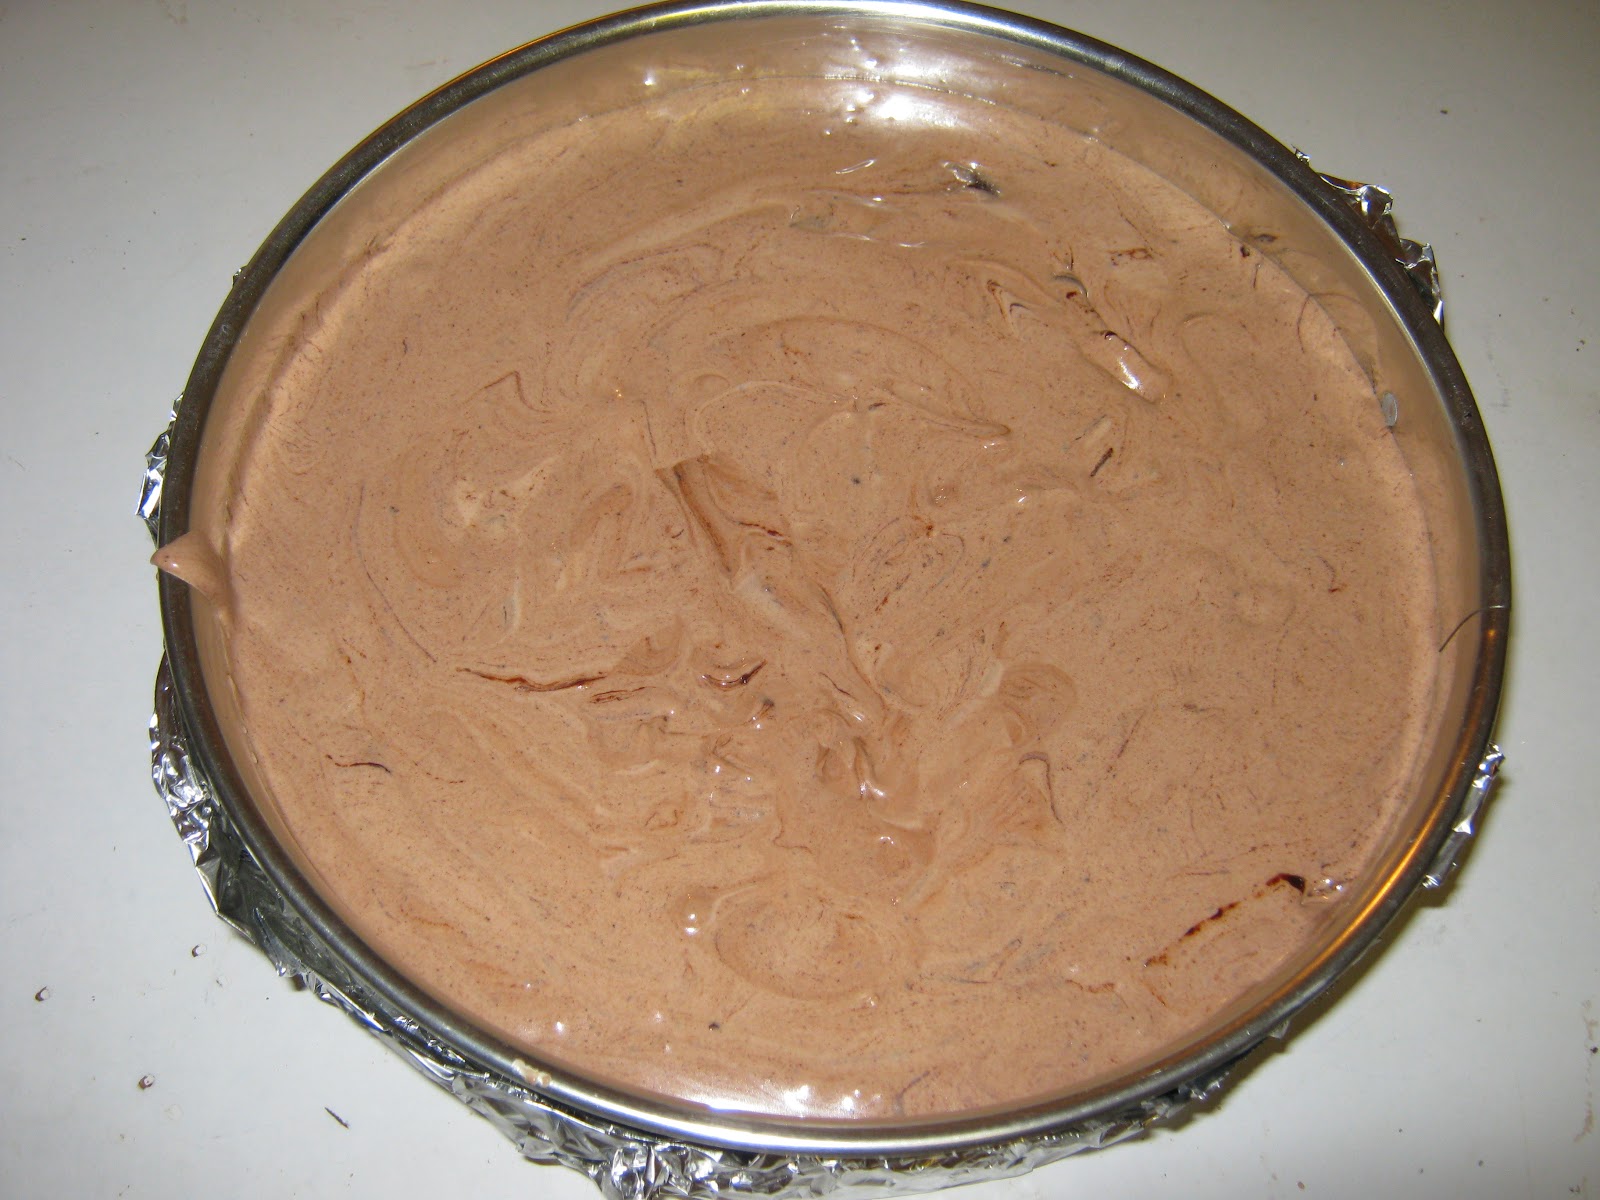
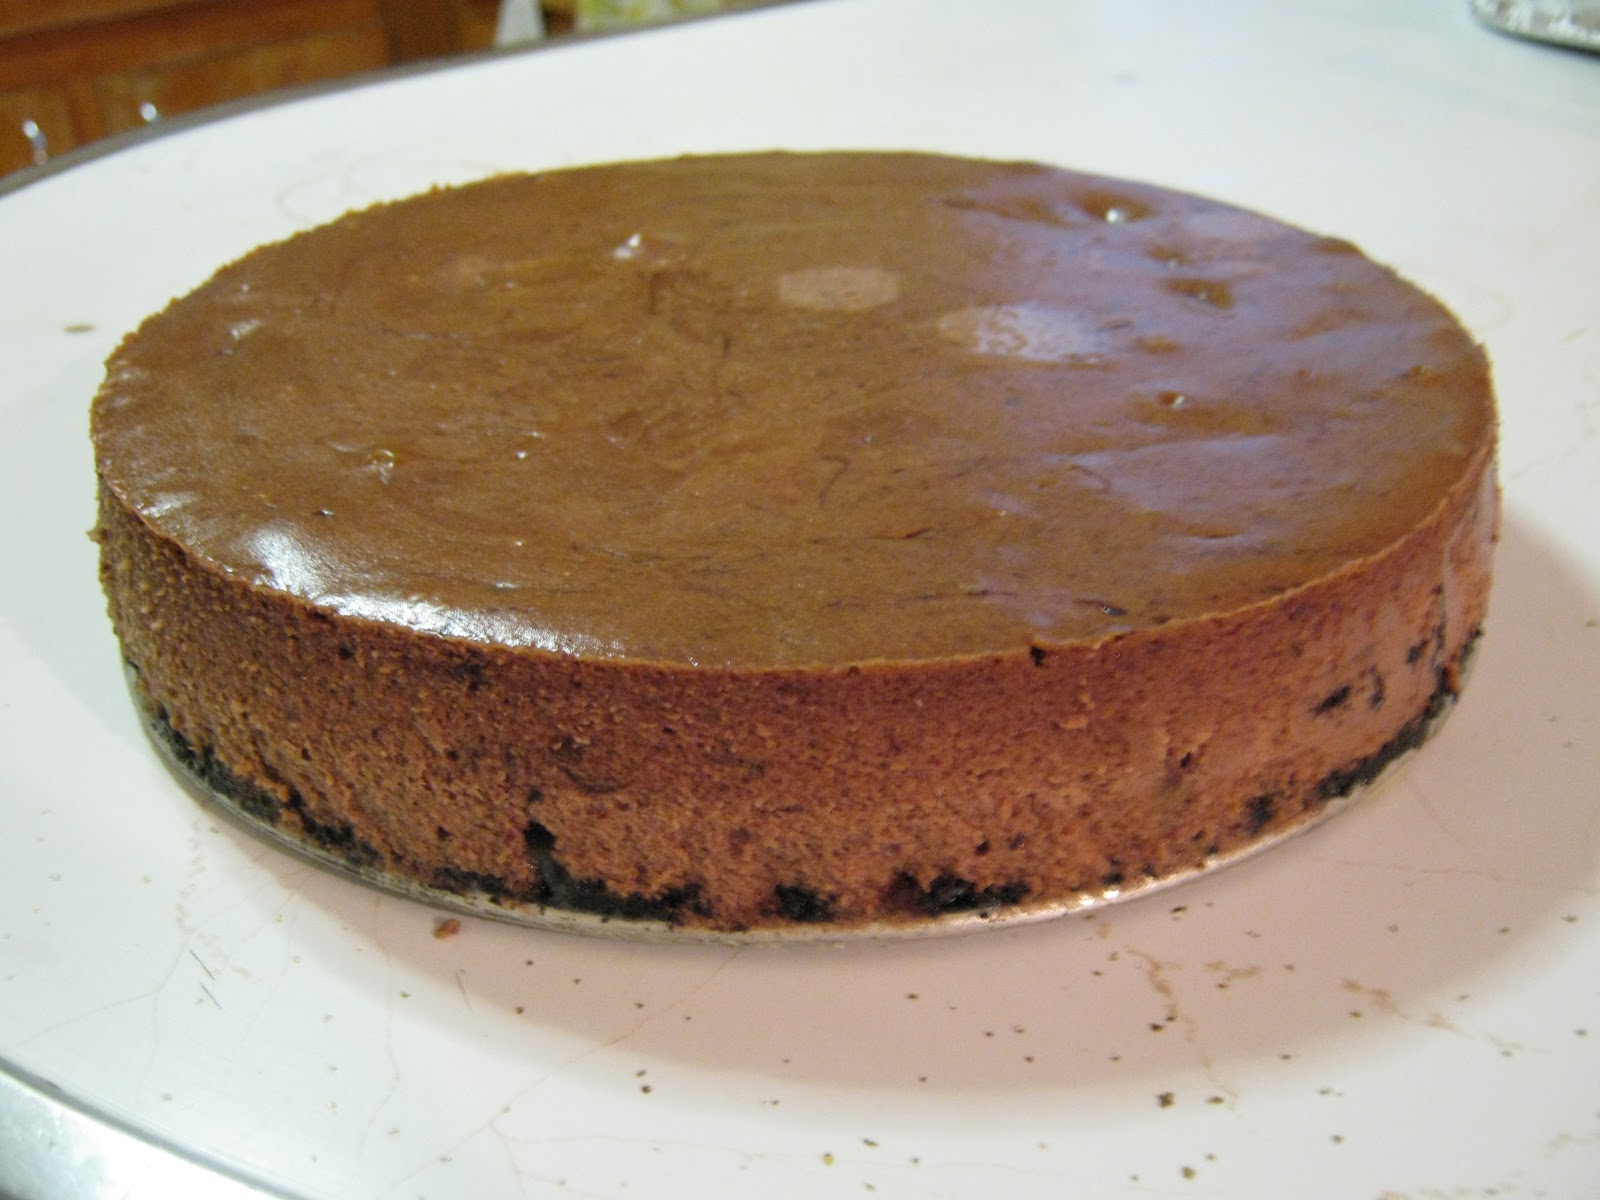
One of my favorite things to bake is cheesecake. Since I did not have a chance to make anything new lately, I finally decided to try a new cheesecake from one of my favorite baking books 125 Best Cheesecake Recipes by George Geary. I will begin by saying that the cappuccino cheesecake has always been a family favorite, and one of the reasons why I couldn't make any new cheesecakes for the longest time is because I'd either be making that or an Oreo Cheesecake (second favorite). WELL...let's just say that after making this cheesecake, I don't think I'll be making either cappuccino OR Oreo for a long time because this became the all-time favorite. It's sinfully delicious and just perfect for chocolate lovers. The pieces of truffle inside are like hidden treasures waiting to be devoured and melt in your mouth. You can decorate the top with pieces of truffle/chocolate shavings and whipping cream, or serve as is.
Note: I did not make a decoration for the top due to laziness and it still tasted amazing. But definitely do the decoration if you can - it'll look and taste even better.


Before you start, you will need to do the following:
*Preheat oven to 350 degrees F
*Greased 9-inch springform/cheesecake pan with 3-inch sides

Ingredients:

Crust
  • 1 1/2 cups chocolate sandwich cookie crumbs
  • 1/4 cup (4 tbsp) unsalted butter, melted
Filling
  • 1/2 cup whipping cream
  • 8 oz bittersweet or semi-sweet chocolate, chopped fine
  • 3 (8 oz) packages cream cheese, softened
  • 1 cup granulated sugar
  • 2 eggs
  • 1/4 cup unsweetened cocoa powder
  • 1 tbsp all-purpose flour
  • 1/2 cup sour cream
  • 1 tsp vanilla
Decoration
  • Classic whipped cream topping (See recipe below)
  • 1/2 cup chocolate shavings

1. For the crust, in a medium bowl, mix cookie crumbs and butter. Press into bottom of cheesecake pan and freeze.

2. For the truffle that will go in the filling, in a small saucepan over high heat, bring cream to a boil. Pour over the chopped up chocolate in a bowl and stir until blended. Set aside in the freezer until very firm.


3. Next, in a large bowl, beat cream cheese and sugar on medium-high for 3 minutes. Add eggs, one at a time, beating after each addition. Add cocoa powder, flour, sour cream, and vanilla. 

4. Take out the truffle mixture from the freezer, and using a spoon, scrape firm chocolate mixture into small pieces and fold (using a rubber spatula) into the batter.


5. Take out the frozen crust from the freezer. Pour the cheesecake mixture over the frozen crust, and bake the cheesecake for 45-55 minutes or until the top is light brown.


6. After the cheesecake is done and you take it out of the oven, cool the cheesecake on a rack for 2 hours. Then, cover and refrigerate for 6 hours before decorating.


7. For the decoration, ice the top of the cake with the classic whipped cream topping or pipe rosettes around the top of the cake, if desired. Top with chocolate shavings.

Classic Whipped Cream Topping:

Ingredients:

1/2 cup whipping cream
2 tbsp granulated sugar

1. In a well-chilled bowl, whip cream on medium-high speed until soft peaks form. 

2.With the mixer still running, sprinkle sugar into cream and continue whipping until firm peaks form. Note: After the soft peaks stage, DO NOT OVERWHIP, otherwise the whipping cream will turn into butter and you will have to make a new batch. 


Thursday, September 13, 2012

Chocolate Cake Part 2

I made the chocolate cake again that I made previously and posted about on my blog. Here's the recipe from the Food Network website where I originally got it from: http://www.foodnetwork.com/recipes/ina-garten/beattys-chocolate-cake-recipe/index.html, and here is my previous post on it: http://www.bakingwithz.blogspot.com/2012/01/chocolate-cake-well-sort-of.html. Beatty's Chocolate Cake turned out just as amazing this time around if not better. I can almost swear that it's the best chocolate cake recipe out there!!!


The reason why I'm doing ANOTHER post on this cake is because I did not use the same frosting recipe from the Food Network website. Also, I decorated my cake differently. (No chocolate curls!) This time, I used a chocolate buttercream frosting recipe from the following website: http://savorysweetlife.com/2011/04/chocolate-buttercream-frosting/. This is an AMAZING frosting...not too chocolatey, not too sweet, and smooth and creamy. The recipe can be found below.

The important note I would like to add is that for this particular cake, I changed up the frosting a little bit. From the chocolate recipe, I took out one third of the frosting BEFORE I added the cocoa powder. That left me with some vanilla frosting. After I took out some vanilla frosting, I reduced the amount of cocoa it says in the recipe and added it to the rest of the frosting mixture. For the decoration of the cake, I basically filled the inside of the cake with the chocolate frosting, and then I covered the outside with most of what was remaining (leaving a little bit aside to pipe some flowers). Finally, I piped some designs and flowers with the vanilla frosting I put aside and the remaining chocolate frosting. To make it look pretty, I even added edible pearls (It's an appropriate addition for a celebratory occasion such as an engagement or anniversary!)

Here's another view of the final product:


Chocolate Frosting Recipe:

Ingredients
  • 1 cup unsalted butter (2 sticks or 1/2 pound), softened (but not melted!)
  • 3 1/2 cups confectioners (powdered) sugar
  • 1/2 cup cocoa powder
  • 1/2 teaspoon table salt
  • 2 teaspoons vanilla extract or 1 teaspoon almond extract
  • 4 tablespoons milk or heavy cream
Instructions
  1. Cream butter for a few minutes in a mixer with the paddle attachment on medium speed. Turn off the mixer. 
  2. Sift 3 cups powdered sugar and cocoa into the mixing bowl. Turn your mixer on the lowest speed (so the dry ingredients do not blow everywhere) until the sugar and cocoa are absorbed by the butter.
  3. Increase mixer speed to medium and add vanilla extract, salt, and milk/cream and beat for 3 minutes.  (If your frosting needs a more stiff consistency, add a little more sugar. If your frosting needs to be thinned out, add additional milk 1 tablespoon at a time.)

ENJOY! :)

Saturday, January 28, 2012

Chocolate Cake (well, sort of)

I've made chocolate cake before with vanilla frosting, but never with chocolate frosting. Recently, it was my brother's birthday and I decided to make him a nice, simple chocolate cake and then dress it up on the top. Well, on my long and hard search for a recipe (haha...not really...I just clicked on the first website in the search), which was basically Googling "Best Chocolate Cake Recipe," I came upon this: Beatty's Chocolate Cake Recipe from the Food Network. Since this recipe had thousands of good reviews, I thought I'd give it a try. I have 2 things to say. First, this cake has an AMAZING texture...just how a cake should be...soft, moist, and tight-crumbed....the kind you get when you use a mix, but of course this is all made from scratch. I think the fact that it uses oil instead of butter as well as buttermilk has a lot to do with it.

The interesting thing about this recipe is that it uses coffee as part of the flavoring in the cake and the frosting, which brings me to the second point. In the cake, you can't really taste the coffee and it's used to actually bring out the chocolate flavor more. However, for the frosting, it turned out to be more of a strong coffee-flavored buttercream than a chocolate one. Now me being a coffee lover, that's not a problem at all. But for people who aren't, this may pose a problem. So then, I would just recommend omitting the coffee. What confuses me then, is why label this recipe a "Chocolate Cake" recipe? The title is certainly deceiving. But, other than that, I have no other criticism, so enjoy making it because it will definitely be my go-to chocolate cake recipe from now on.

Oh...can't forget my own touch that I added to the cake...when decorating, make it more delicious by adding white and/or milk chocolate curls! I also added decorating pearls and gold flakes to make it look fancy. To learn how to make chocolate curls/shavings, watch this video How to make chocolate curls OR this video Making chocolate shavings. I use the method from the second video, but I tend to angle my metal spatula in a way that will allow me to get more curls than shavings. White Chocolate is much harder to deal with because of its texture, and you're probably going to end up getting shavings more than curls like I did.


Ingredients

  • Butter, for greasing the pans
  • 1 3/4 cups all-purpose flour, plus more for pans
  • 2 cups sugar
  • 3/4 cups good cocoa powder
  • 2 teaspoons baking soda
  • 1 teaspoon baking powder
  • 1 teaspoon kosher salt
  • 1 cup buttermilk, shaken
  • 1/2 cup vegetable oil
  • 2 extra-large eggs, at room temperature
  • 1 teaspoon pure vanilla extract
  • 1 cup freshly brewed hot coffee
  • Chocolate Buttercream, recipe follows

Directions

Preheat the oven to 350 degrees F. Butter two 8-inch x 2-inch roundcake pans. Line with parchment paper, then butter and flour the pans.
Sift the flour, sugar, cocoa, baking soda, baking powder, and salt into the bowl of an electric mixer fitted with a paddle attachment and mix on low speed until combined. In another bowl, combine the buttermilk, oil, eggs, and vanilla. With the mixer on low speed, slowly add the wet ingredients to the dry. With mixer still on low, add the coffee and stir just to combine, scraping the bottom of the bowl with a rubberspatula. Pour the batter into the prepared pans and bake for 35 to 40 minutes, until a cake tester comes out clean. Cool in the pans for 30 minutes, then turn them out onto a cooling rack and cool completely.
Place 1 layer, flat side up, on a flat plate or cake pedestal. With a knife or offset spatula, spread the top with frosting. Place the second layer on top, rounded side up, and spread the frosting evenly on the top and sides of the cake.


Chocolate Frosting:
  • 6 ounces good semisweet chocolate (recommended: Callebaut)
  • 1/2 pound (2 sticks) unsalted butter, at room temperature
  • 1 extra-large egg yolk, at room temperature
  • 1 teaspoon pure vanilla extract
  • 1 1/4 cups sifted confectioners' sugar
  • 1 tablespoon instant coffee powder
Chop the chocolate and place it in a heat-proof bowl set over a pan of simmering water. Stir until just melted and set aside until cooled to room temperature.
In the bowl of an electric mixer fitted with a paddle attachment, beat the butter on medium-high speed until light yellow and fluffy, about 3 minutes. Add the egg yolk and vanilla and continue beating for 3 minutes. Turn the mixer to low, gradually add the confectioners' sugar, then beat at medium speed, scraping down the bowl as necessary, until smooth and creamy. Dissolve the coffee powder in 2 teaspoons of the hottest tap water. On low speed, add the chocolate and coffee to the butter mixture and mix until blended. Don't whip! Spread immediately on the cooled cake.

Friday, January 6, 2012

Cookies N' Cream Brownies

So for awhile now, I've been craving a rich and chocolatey brownie. I also happened to get my hands on The Taste of Home Baking Book. This book has a great selection of brownie recipes which I can't wait to try. As I flipped through, my eyes landed on a particular recipe since it has one of my favorite ingredients: Oreo Cookies. To be honest, I think that you simply can't go wrong with anything that has Oreos because they are just so darn good. My mind for the first choice was made up. The good news is that the brownies turned out great! They are moist and not too sweet. On the downside, I didn't really taste any Oreo flavor. So if I make these again, I will definitely be adding an Oreo topping of some sort, which will also add a nice touch.


Ingredients:
  • -1 package (8 ounces) cream cheese, softened
  • -1/4 cup sugar
  • -1 egg
  • -1/2 teaspoon vanilla extract

  • BROWNIE LAYER:
  • -1/2 cup butter, melted
  • -1/2 cup sugar
  • -1/2 cup packed brown sugar
  • -1/2 cup baking cocoa
  • -2 eggs
  • -1 teaspoon vanilla extract
  • -1/2 cup all-purpose flour
  • -1 teaspoon baking powder
  • -12 cream-filled chocolate sandwich cookies, crushed

Directions:

  • 1. In a small bowl, beat the cream cheese, sugar, egg and vanilla until smooth; set aside.
  • Tip: Make sure you scrape down the bowl while beating the cream cheese mixture AND the brownie mixture. You don't want any lumps leftover inside each of the mixtures before you pour them into the pan. At the same time, don't beat the mixtures too much because it can ruin the texture of the brownie. 


2. For brownie layer, combine the butter, sugars and cocoa in a large bowl. 


  • 3. Beat in eggs.


4. Combine flour and baking powder; gradually add to cocoa mixture. 


5. Stir in cookie crumbs.


6. Pour into a greased 11-in. x 7-in. baking pan.


  • 7. Spoon cream cheese mixture over batter; cut through batter with a knife to swirl. 
  • Tip: Don't cut through the batters too much because you don't want to mix up the batters completely. The layers should stay separate - you just want to create a swirl effect for design.


  • 8. Bake at 350° for 25-30 minutes or until a toothpick inserted near the center comes out with moist crumbs. 


9. Cool completely on a wire rack. Cut into bars. Store in the refrigerator.